

Time to Complete Module: 1 hour 30 minutes
Last updated: July 11, 2025
IN THIS MODULE
7.1 Internal Links: Menu
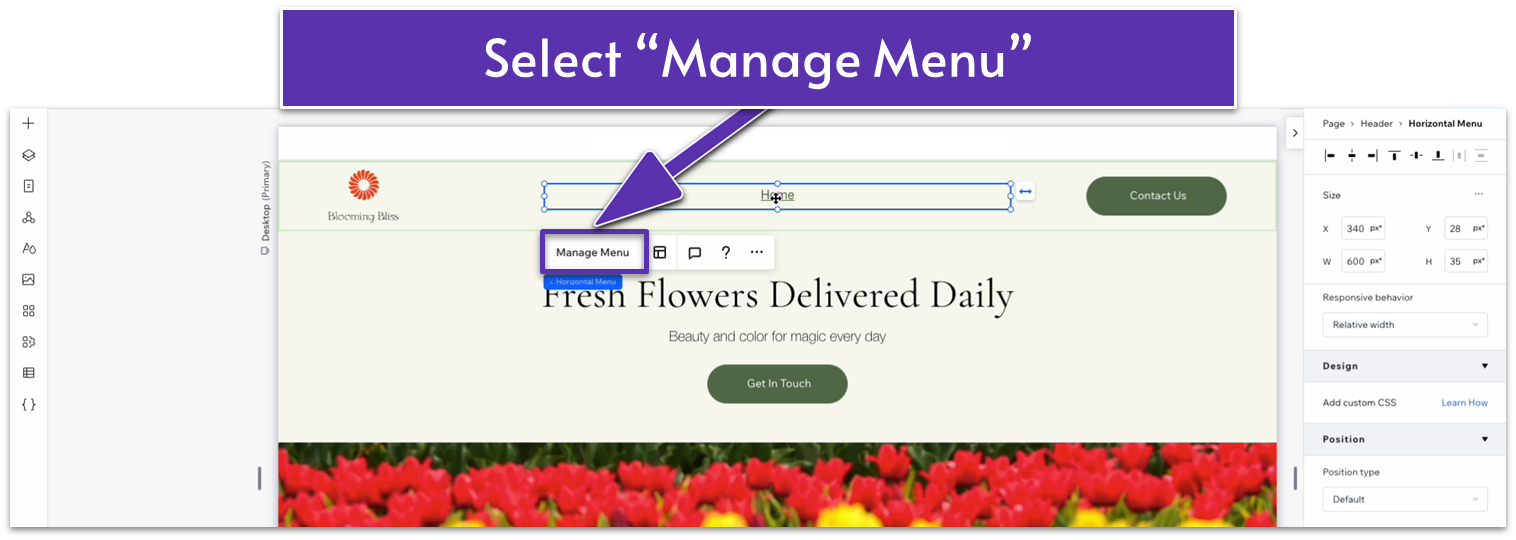
First, we want to ensure visitors can access any page using your site’s menu. Step 1: Go to your homepage Step 2: Edit your header menu- Go to the “Home” icon on your header’s menu and select “Manage Menu” on the pop-up menu.
- Select “Add Item” on the pop-up menu.
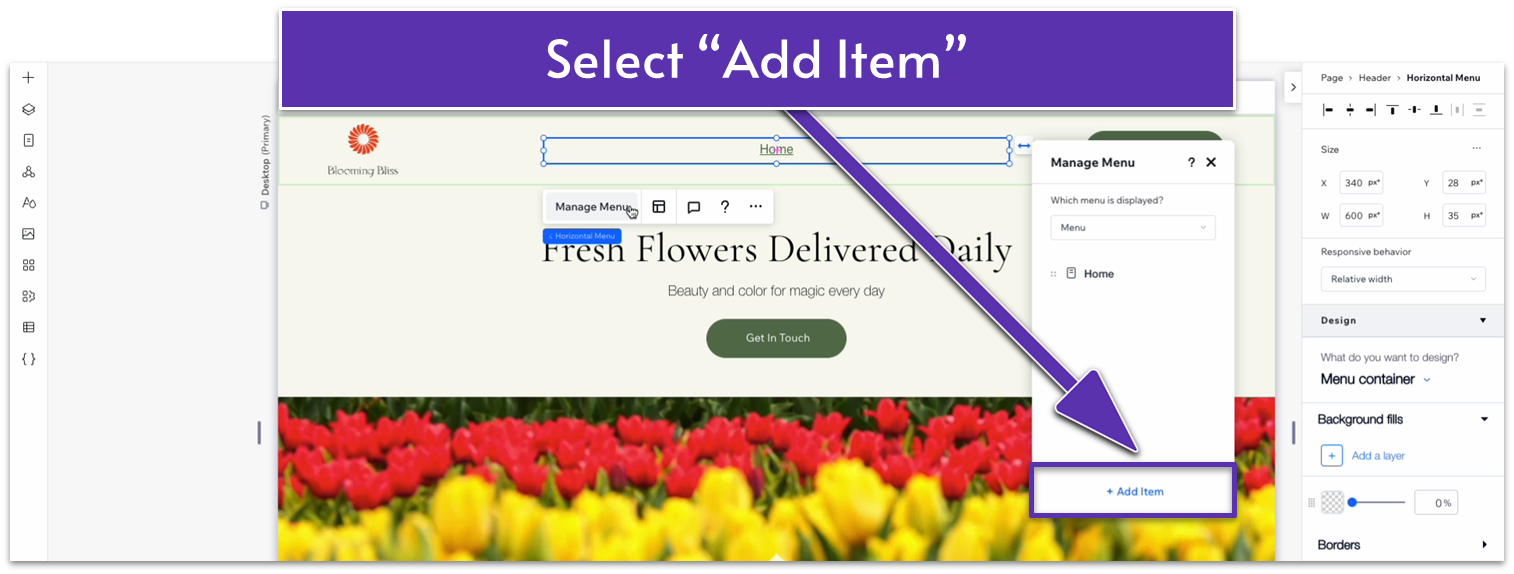
- Then, select “Main Pages.” Toggle on all the pages you want to add to your menu.
 Step 3: Style the menu for mobile and tablet viewing
On tablet view:
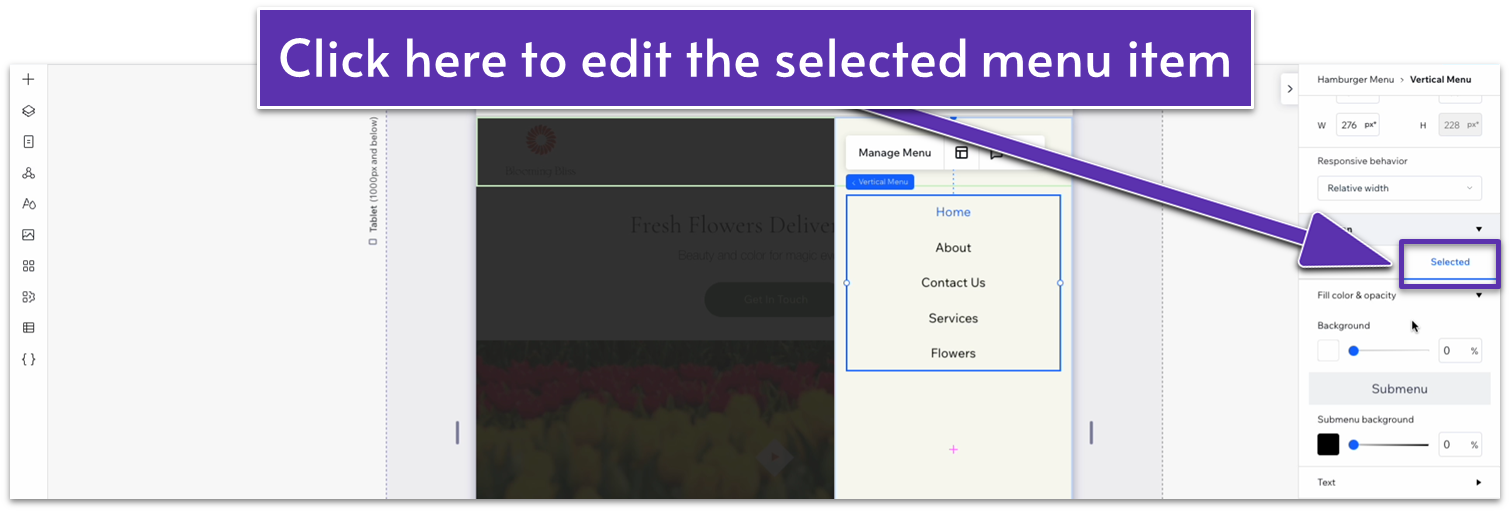
Step 3: Style the menu for mobile and tablet viewing
On tablet view:- Select the hamburger menu item and then “Edit Menu.”

- Using the inspector, change the background color to a light yellow (#F9F9F1 HEX)
- Select the menu items and under “Design,” click on “Selected.” Here, you’ll be able to edit the design of the menu item we’re currently on.
- Set the text color to a dark green (#5C7452 HEX).
- Set the color for “Submenu” to the same dark green (#5C7452 HEX).
7.2 Internal Links: Buttons
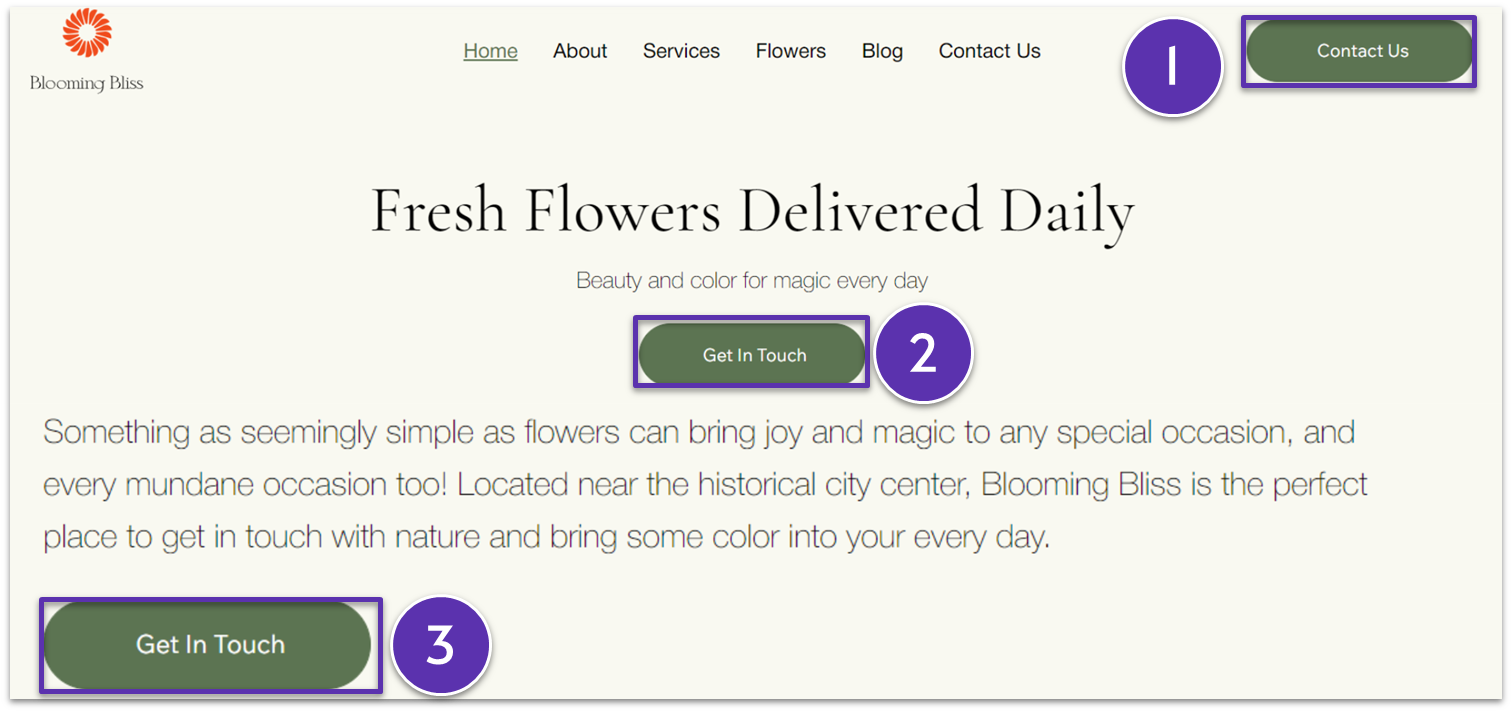
Next, let’s ensure every site button leads visitors to the intended place. Step 1: Select the first button on the homepage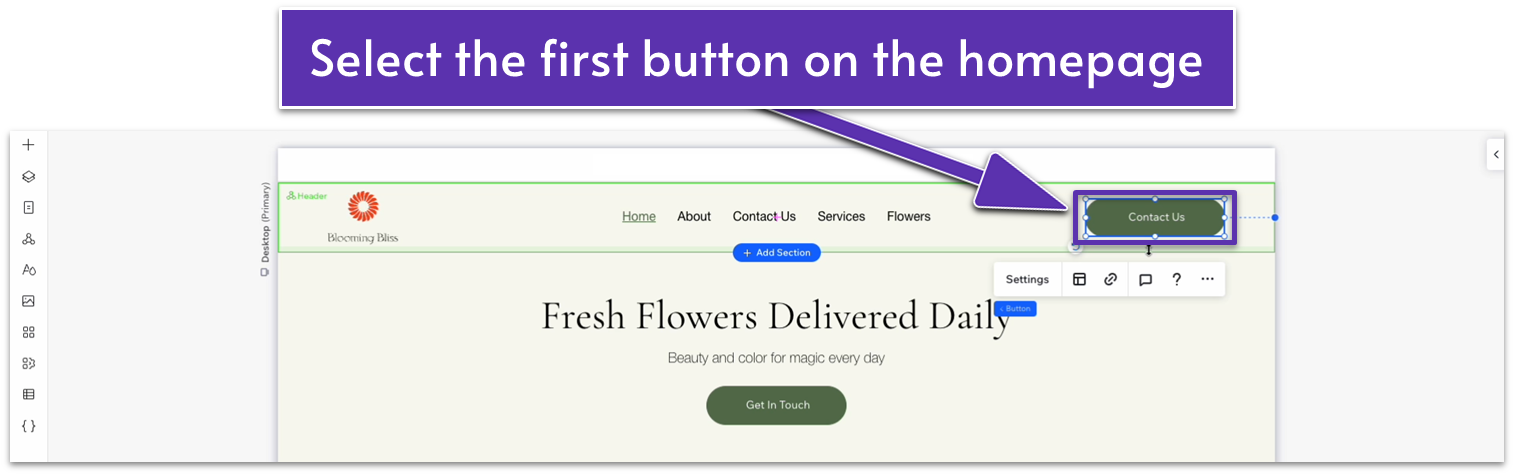
- Select the chain icon on the pop-up menu to add a link to the button.
- Select “page” then set the page to “Contact Us.”
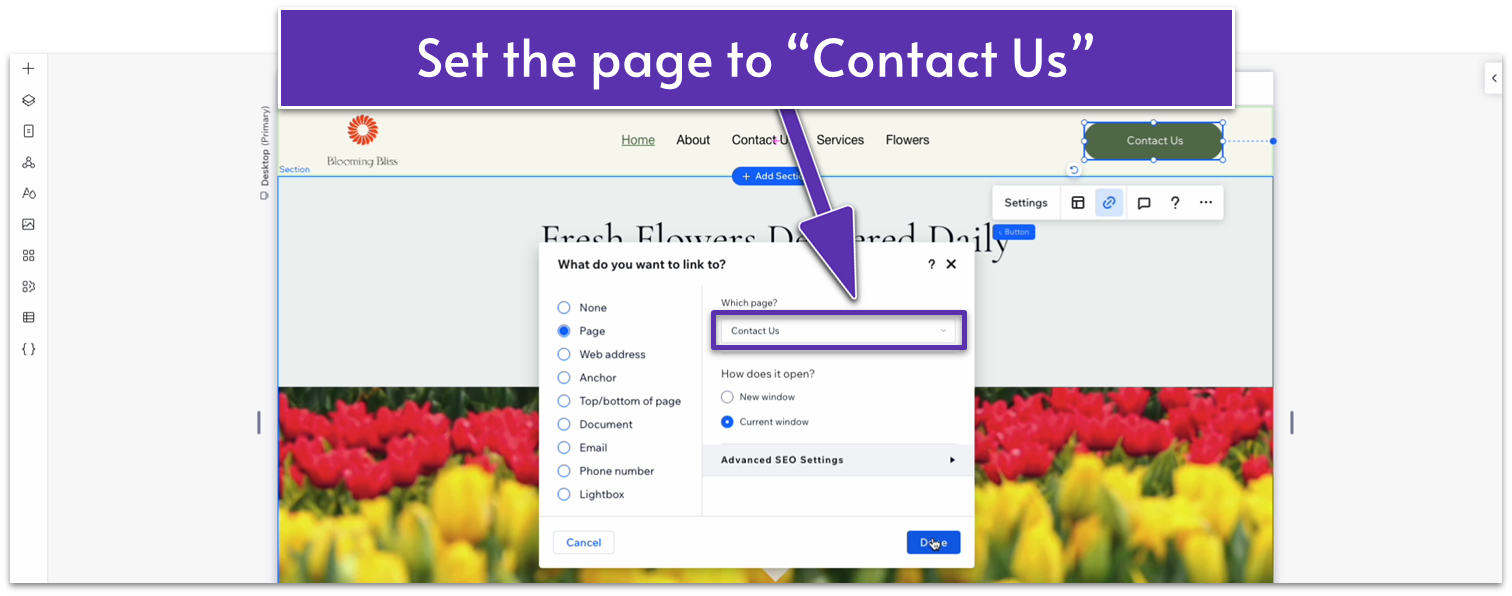
- Then select “Done.”
- We’ll also add links to the text segments we created. All you have to do for this is highlight the appropriate text and follow the same process.
 Step 3: Add links to the footer’s text
- Select the “Home” text on the footer under “Navigation.”
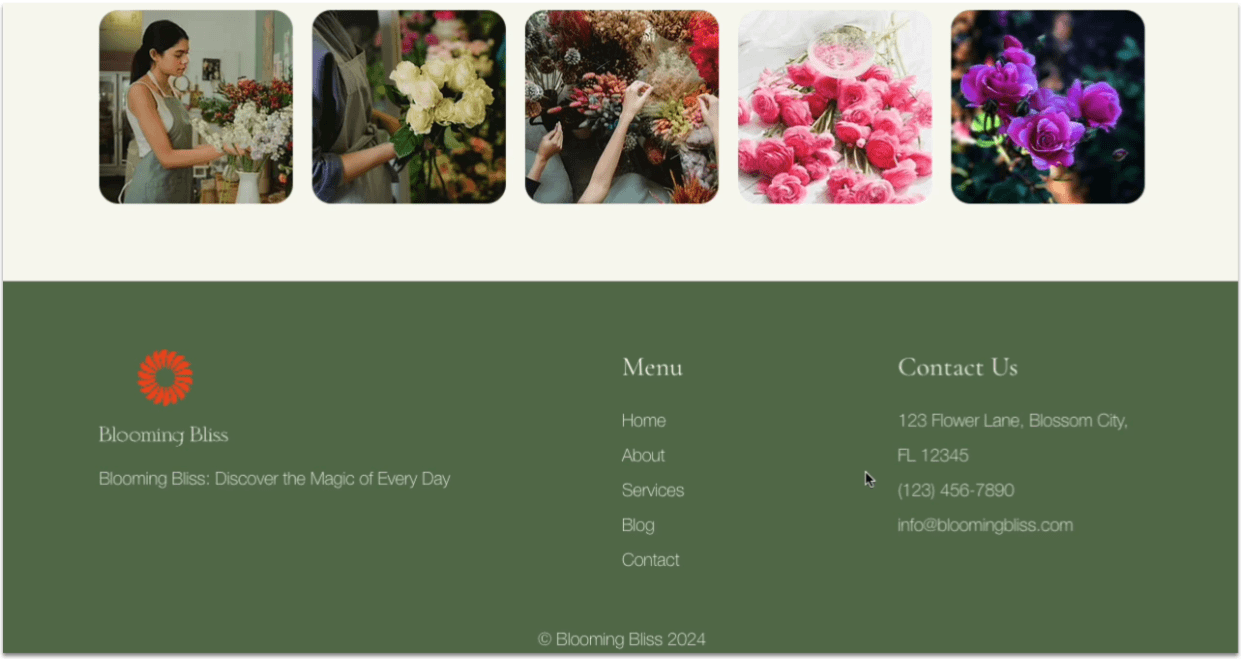
- Highlight the text and add a link to the homepage.
- Select the “About” text below “Home” and repeat the process to add a link to the “About” page.
- Repeat this process for the other options on the footer. Since this is a global section, you don’t have to do this again for each page.
7.3 Metadata: SEO Titles and Meta Descriptions
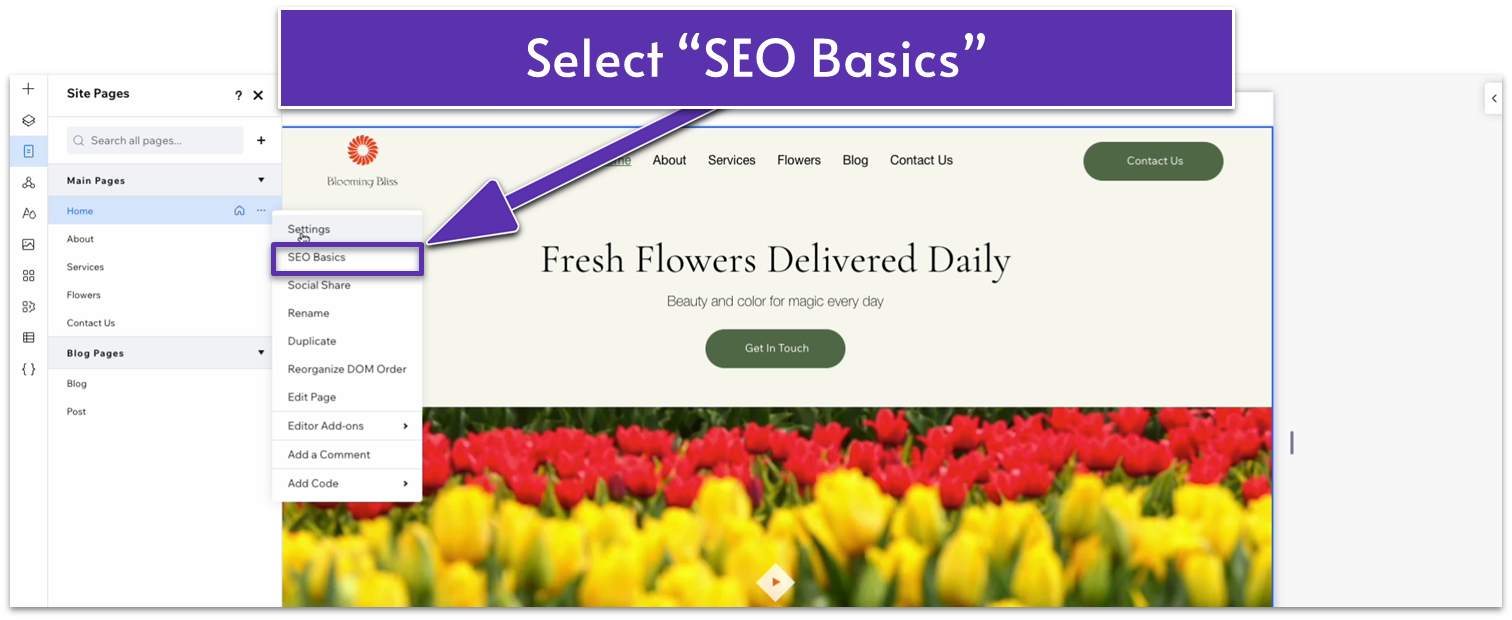
Now, it’s time to set up the metadata for our sites. This metadata includes mostly the HTML tags we discussed in a previous section. We want to make sure that the SEO title and SEO meta description are unique to each page. As we saw previously, we’ll want to incorporate specific keywords through the text. Our web designer for the sample sites provided an example title, as well as their rationale behind it: “‘Flower Shop in Paris – Blooming Bliss’ – this includes keywords and the shop’s location, helping people searching for flowers in Paris find us. I also added the shop’s name after the dash, ‘Blooming Bliss,’ which is a good SEO practice to include the site name in the title.” We’re going to add a meta title to all pages. Here’s how: Step 1: Go to your homepage first Step 2: Open the “SEO Basics” menu- Open the “Pages” menu on the left-hand side.
- Select the three dots icon next to the page name and then “SEO Basics” on the pop-up menu.
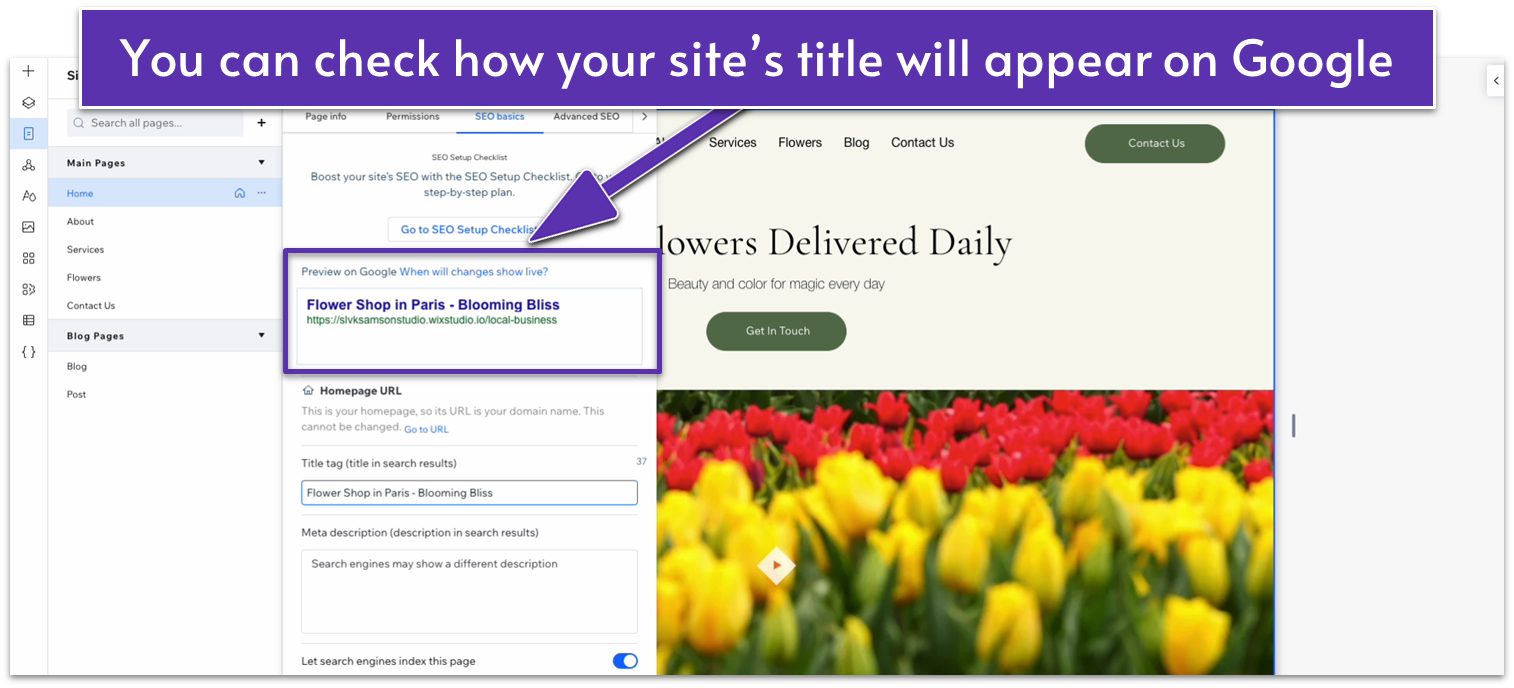
 Step 3: Add an SEO title and meta description to the page
You will see in the box above how your website’s SEO title will appear on Google.
Step 3: Add an SEO title and meta description to the page
You will see in the box above how your website’s SEO title will appear on Google.
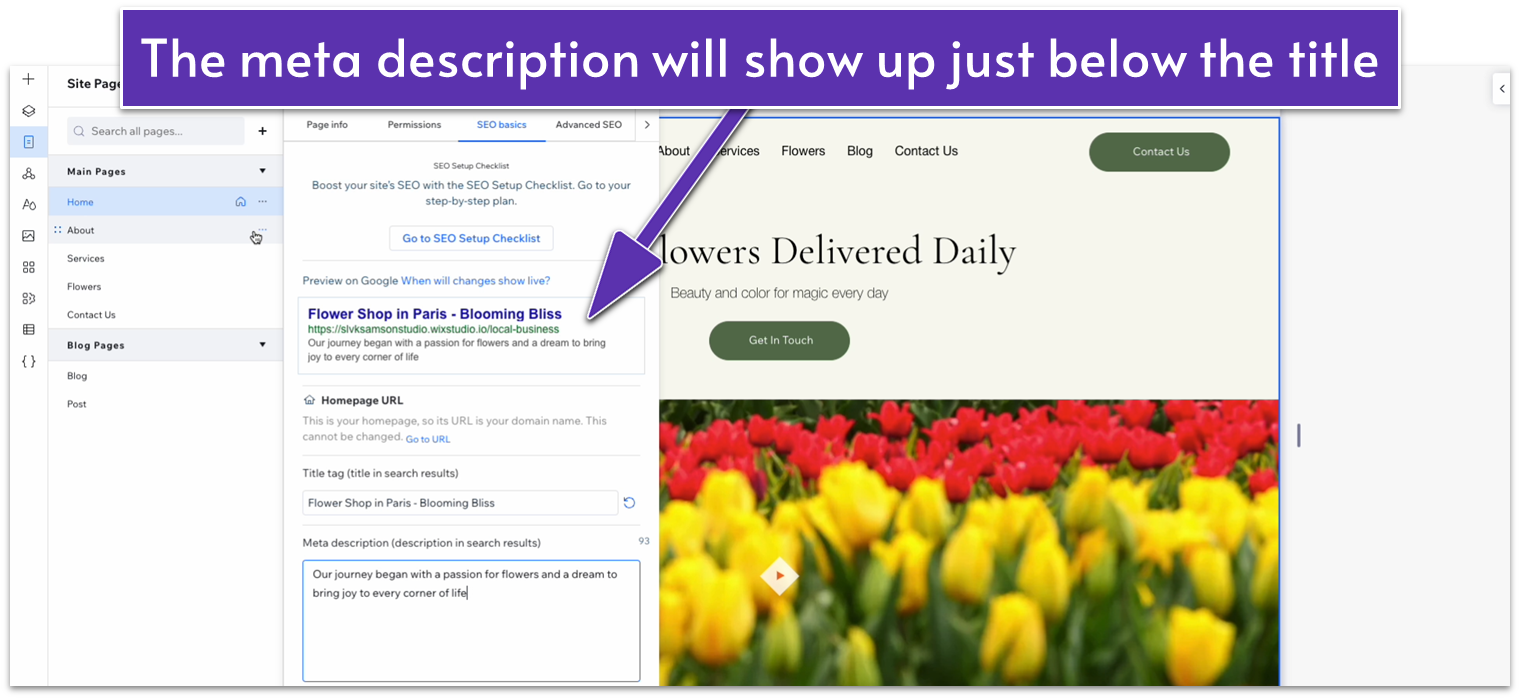
 The meta description is also the snippet of text that will appear under your site’s title on Google.
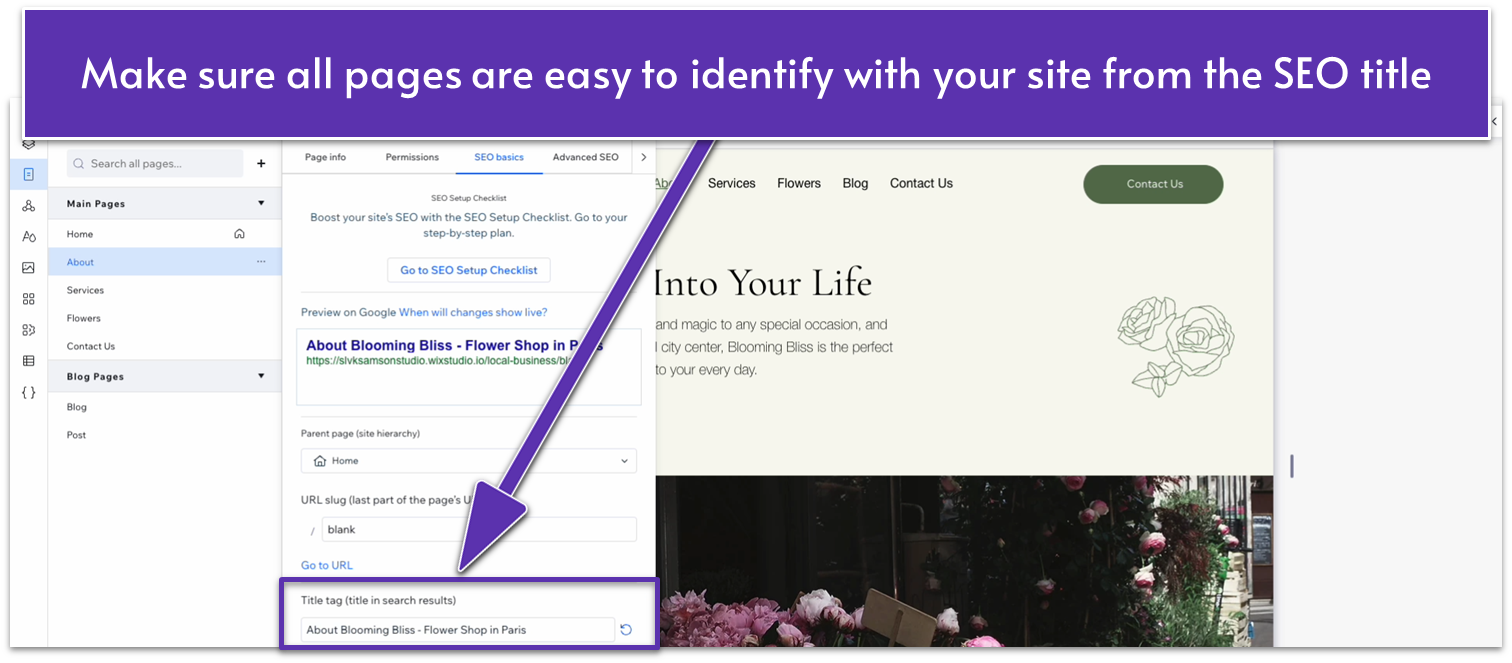
 Step 4: Repeat the same step for other pages
Remember to add something that identifies other pages to your website if it’s not obvious from the title. In this case, we’ll add the name of our business and some descriptive text after every page on the SEO title for clarity.
Step 4: Repeat the same step for other pages
Remember to add something that identifies other pages to your website if it’s not obvious from the title. In this case, we’ll add the name of our business and some descriptive text after every page on the SEO title for clarity.
7.4 Metadata: URL Slugs
Since the URL address of our site will only direct to our homepage, all other pages will include a slug after the URL to show we’re on a different section of the site. Step 1: Open the “SEO Settings” menu for a page other than the homepage You’ll notice that all pages outside the homepage will have an extra field to add a URL slug to the menu. Step 2: Add a URL slug for all pages other than the homepage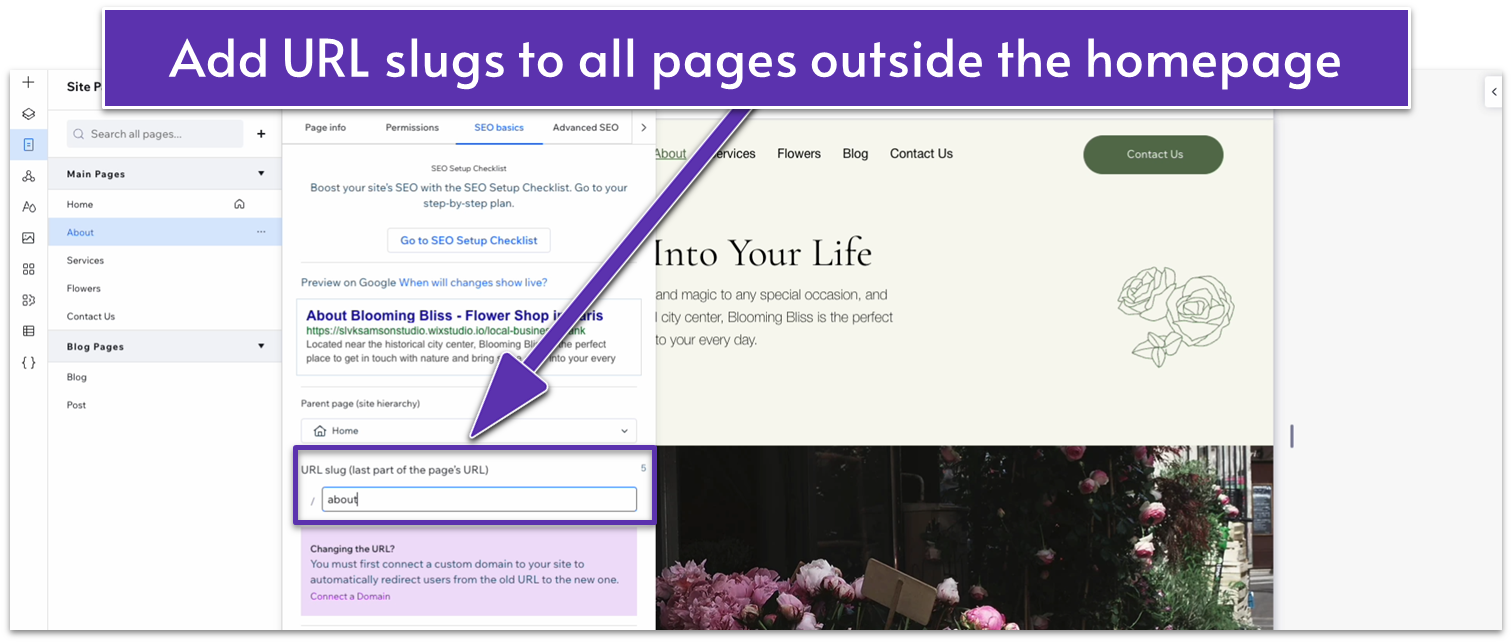
7.5 Wix SEO Checklist
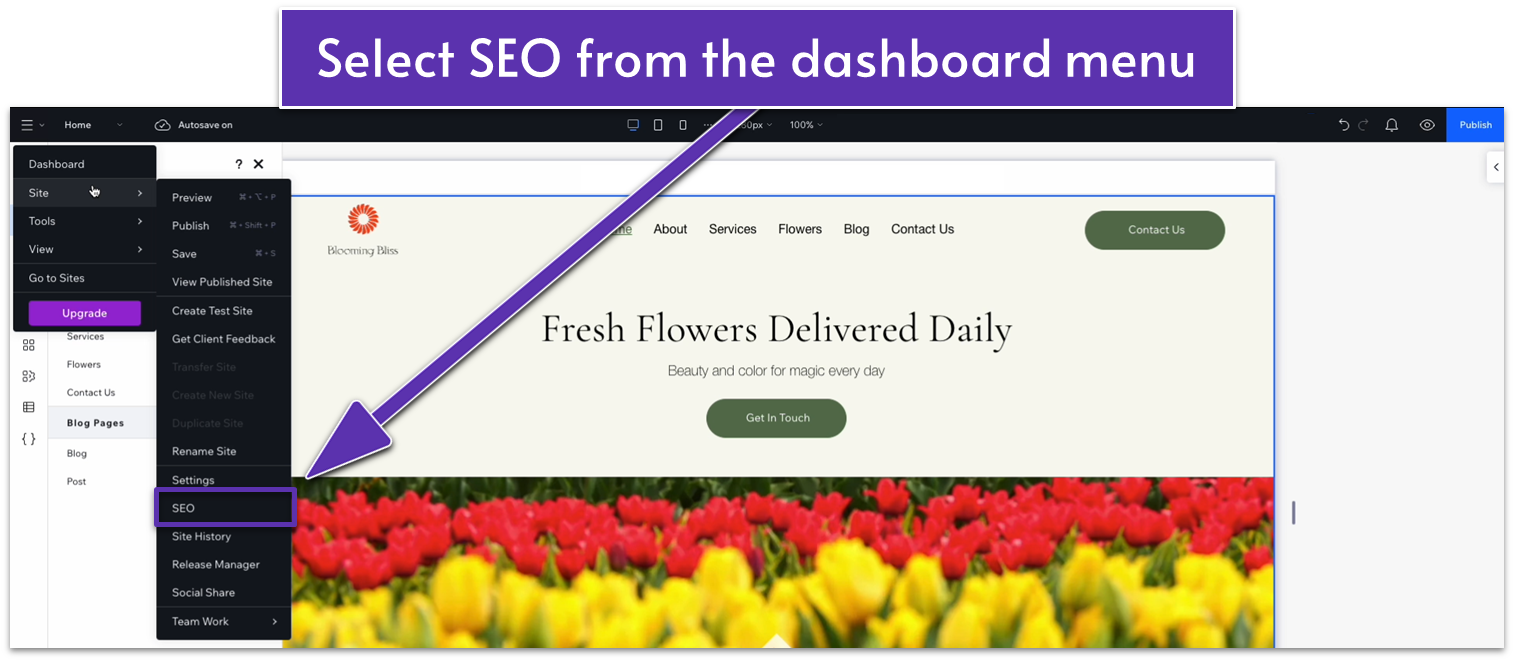
Wix includes a useful SEO checklist to help you optimize your site as much as possible. Once you’re done with the basics, we can jump straight into the SEO checklist to ensure we take all the necessary steps for optimizing our site. Step 1: Open the Wix SEO menu- Click on the hamburger menu on the top-left corner of the editor, then head to “Site” and then “SEO.”
 Step 2: Start the SEO setup checklist
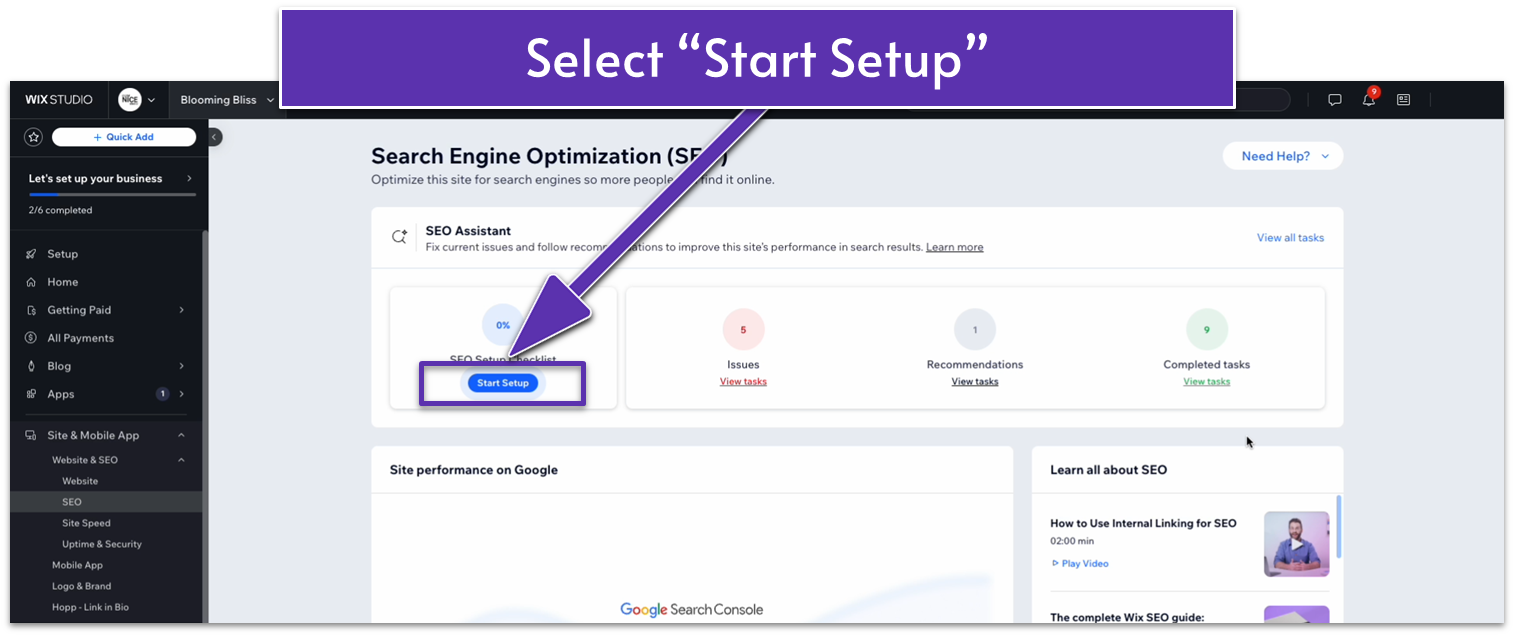
- Select “Start Setup” under “SEO Setup Checklist.”
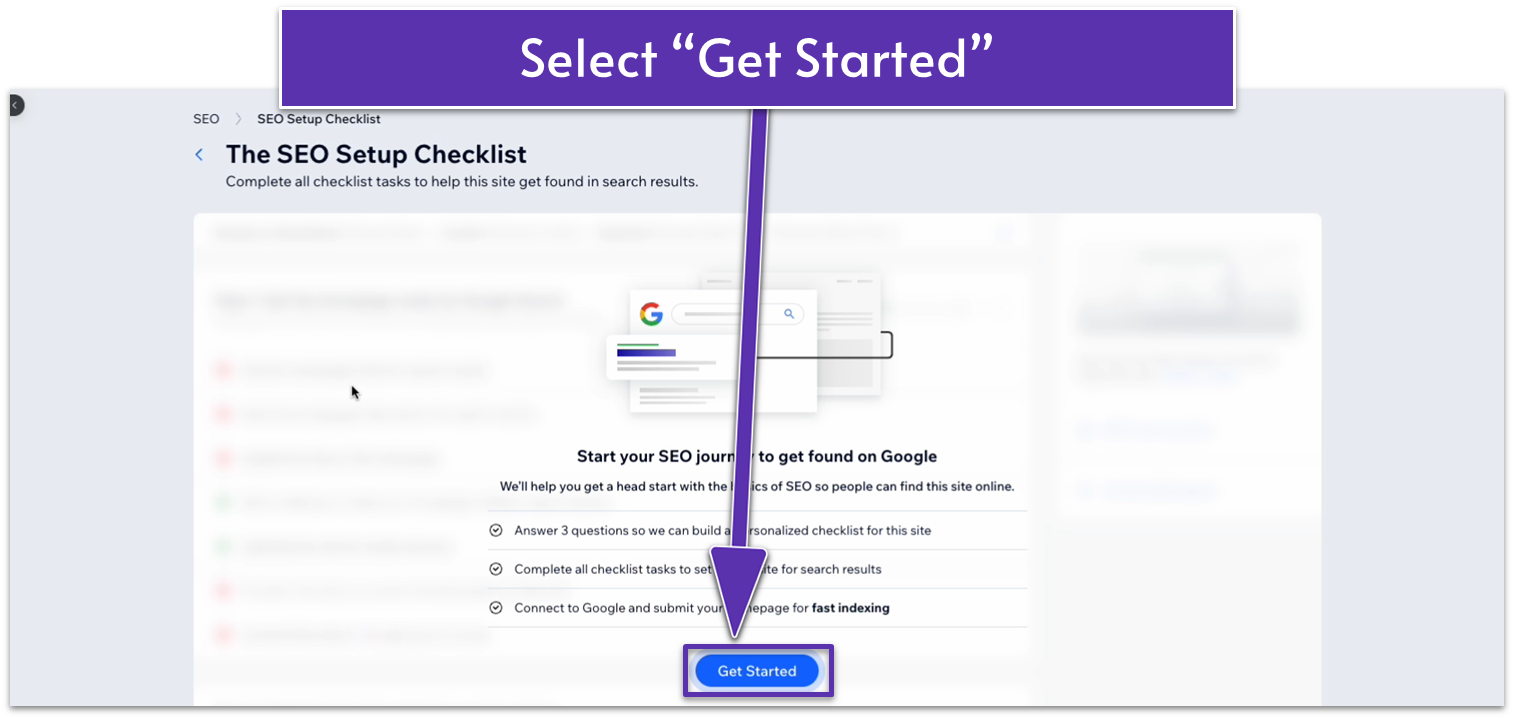
- You’ll go to the checklist’s dashboard. Select “Get Started.”
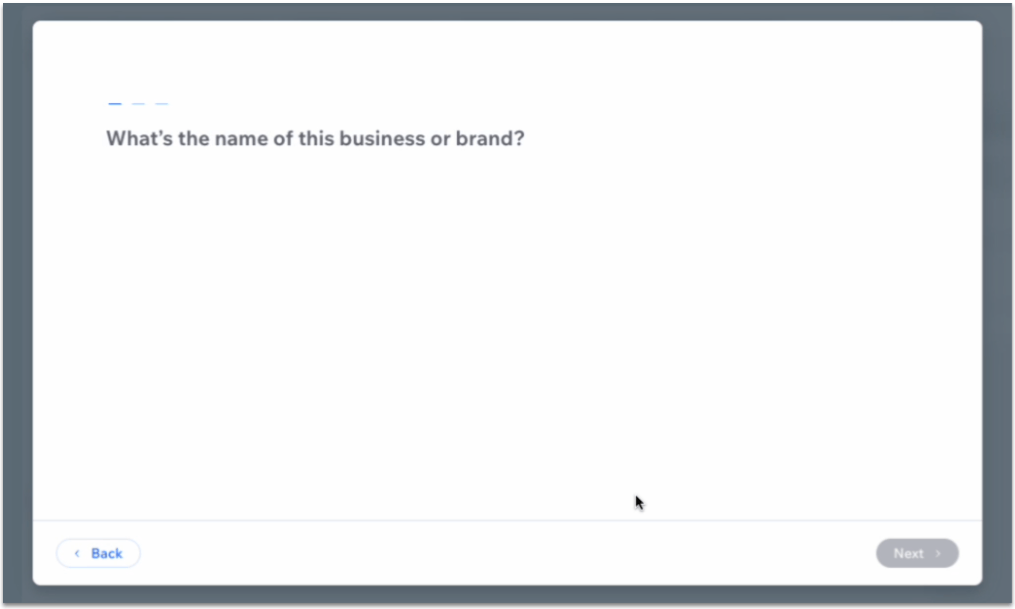
 Step 3: Answer the SEO questionnaire
You’ll be redirected to an SEO questionnaire. Answer the questionnaire with your business information.
Step 3: Answer the SEO questionnaire
You’ll be redirected to an SEO questionnaire. Answer the questionnaire with your business information.
 Step 4: Follow the SEO setup checklist
Once you’ve answered the questionnaire, you’ll have access to a checklist of all the essential steps you need to follow to optimize your website for search engines. We won’t go over each step, since the checklist is a step-by-step list, but we will see how the first one works to give you a better idea.
Step 4: Follow the SEO setup checklist
Once you’ve answered the questionnaire, you’ll have access to a checklist of all the essential steps you need to follow to optimize your website for search engines. We won’t go over each step, since the checklist is a step-by-step list, but we will see how the first one works to give you a better idea.- Hover over an unfinished step and select the “Go for it” button.
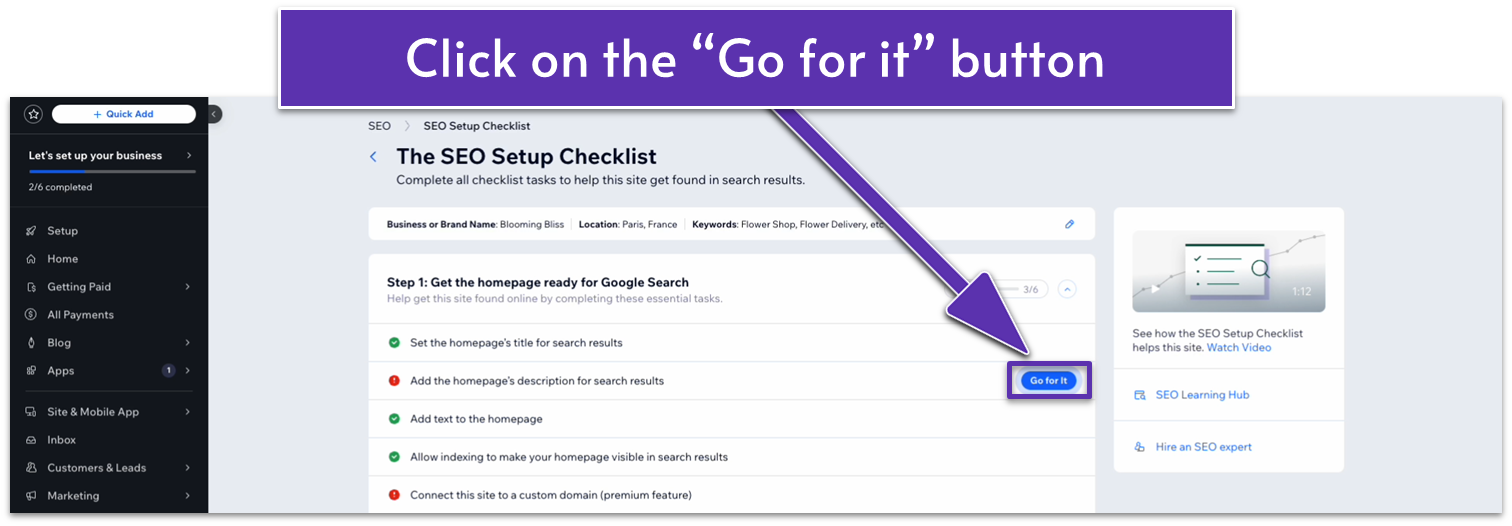
- The step will open up with a more in-depth description of its importance and instructions on how to complete it.
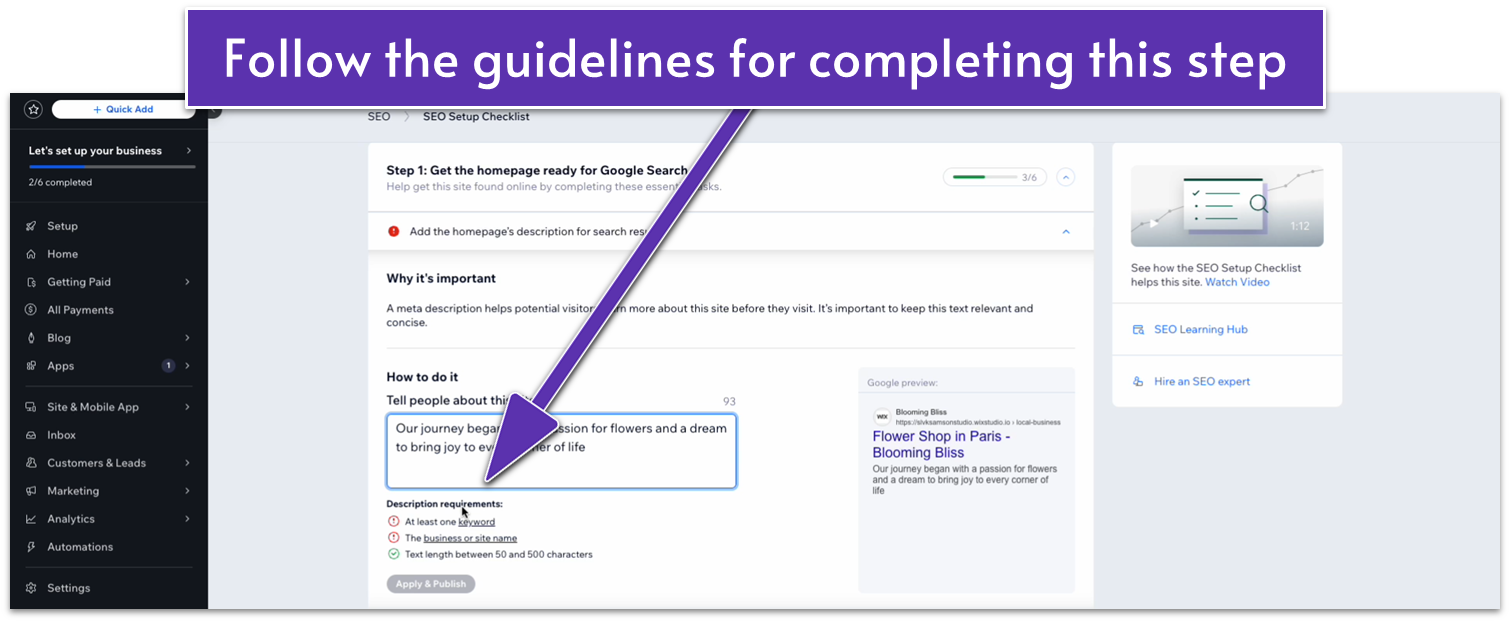 Step 5: Complete the checklist on all pages
You’ll see a different series of steps for each page. Complete the checklist for each page on your site.
Step 5: Complete the checklist on all pages
You’ll see a different series of steps for each page. Complete the checklist for each page on your site.
7.6 Connecting Your Domain
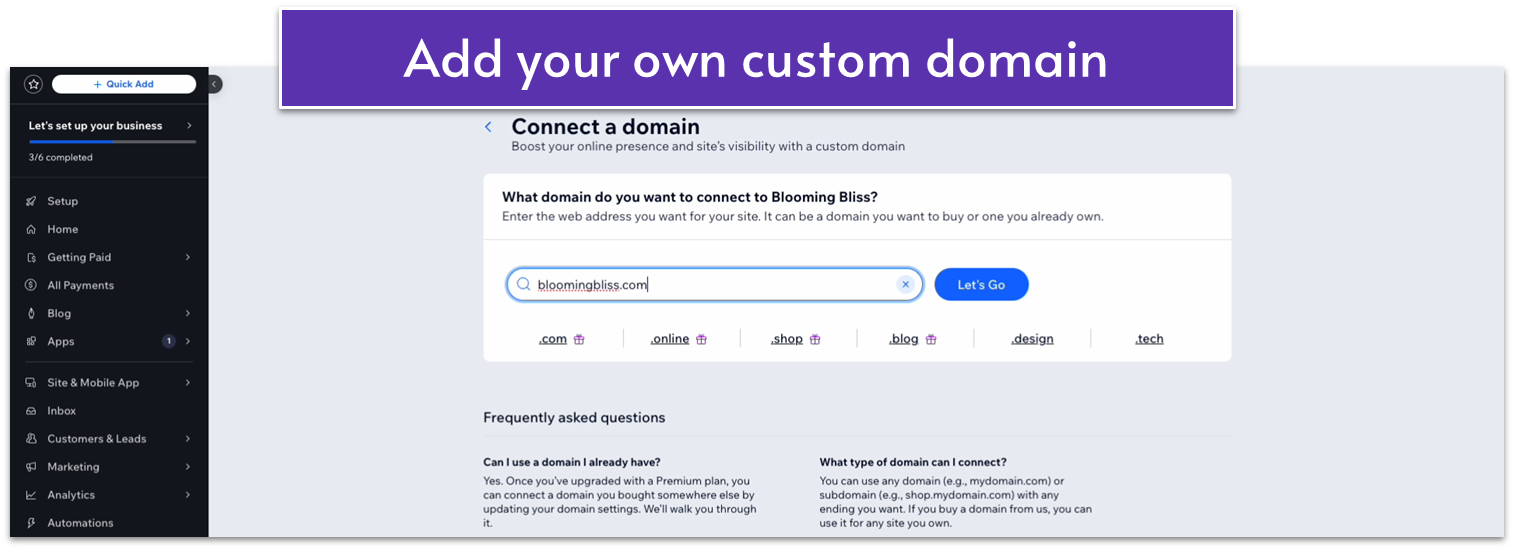
Once you’ve completed all the steps in the Wix SEO checklist, it’s time to finish it all up by actually making your website public. We’ll connect a domain and then submit our site for indexing in Google’s search console. Step 1: On the SEO checklist, select “connect site to a custom domain” Keep in mind that this feature is only available for paid Wix plans.- Click on the “Go for it” button on the checklist menu.
- Select the “Connect a Domain” option.

- Add your domain name on the bar and select “Let’s Go.”
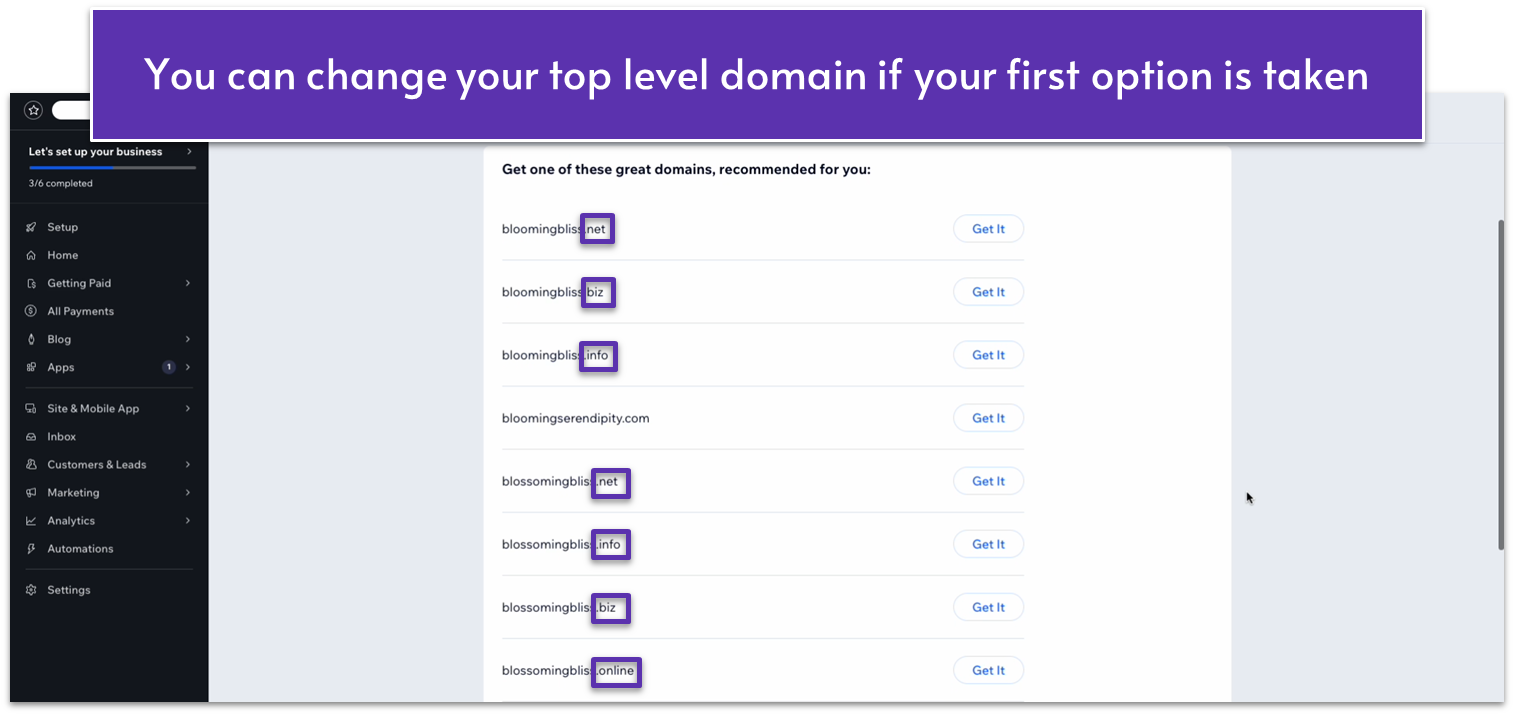
 If you registered your domain name from an external registrar, you’ll see the text “[YOUR DOMAIN NAME] is taken, is it yours?” Select “Yes, I own this domain” to move on.
If you see the same message but don’t own the domain from an external registrar, it means that that particular domain name already belongs to someone else. You can try other variations of your domain or select one of the alternatives recommended by Wix.
If you registered your domain name from an external registrar, you’ll see the text “[YOUR DOMAIN NAME] is taken, is it yours?” Select “Yes, I own this domain” to move on.
If you see the same message but don’t own the domain from an external registrar, it means that that particular domain name already belongs to someone else. You can try other variations of your domain or select one of the alternatives recommended by Wix.
 Step 2: Select a premium plan if you haven’t already
When you move to register your domain, you’ll see the following page if you haven’t signed up for a premium plan.
Step 2: Select a premium plan if you haven’t already
When you move to register your domain, you’ll see the following page if you haven’t signed up for a premium plan.
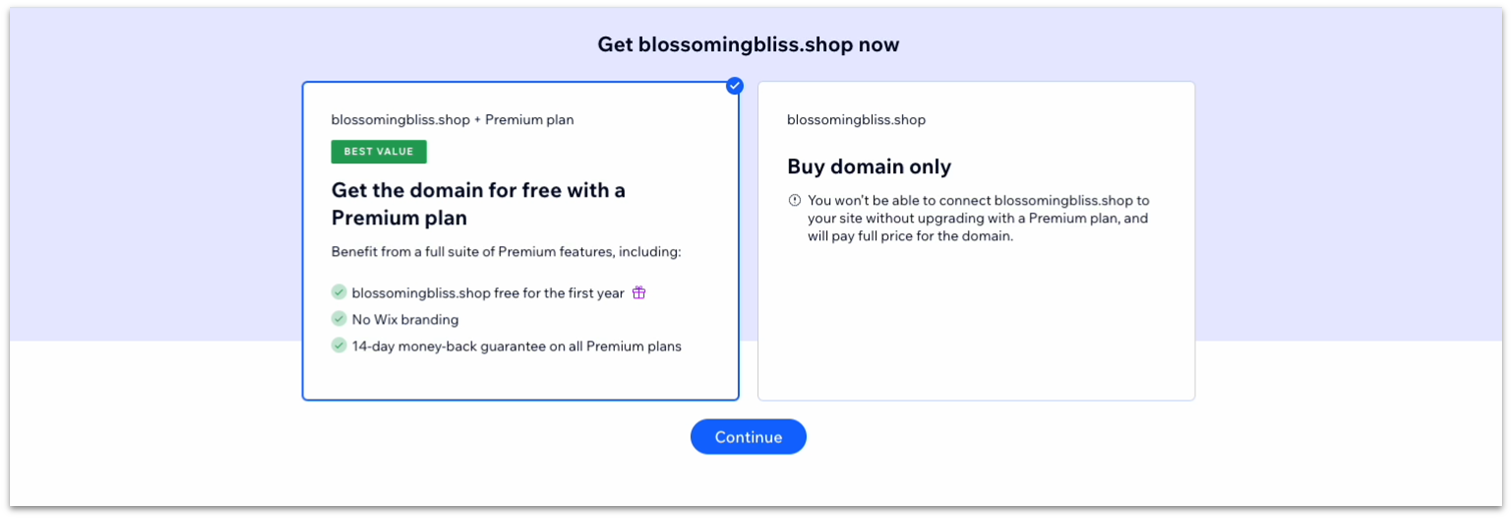 If your goal is to publish a professional website, we recommend going for a premium plan out of the gate. A premium plan removes the Wix branding from your site, offers your domain name as a free option for a year, improves your storage space, and gives you access to site analytics.
Step 3: Connect your site to the Google Search console
Now that your site has a custom domain, and you’ve followed all the most important SEO recommendations, it’s time to connect it to the Google search console.
To do this, simply complete the final step on the Wix SEO guide and select “Connect Now.” The rest should be smooth sailing.
If your goal is to publish a professional website, we recommend going for a premium plan out of the gate. A premium plan removes the Wix branding from your site, offers your domain name as a free option for a year, improves your storage space, and gives you access to site analytics.
Step 3: Connect your site to the Google Search console
Now that your site has a custom domain, and you’ve followed all the most important SEO recommendations, it’s time to connect it to the Google search console.
To do this, simply complete the final step on the Wix SEO guide and select “Connect Now.” The rest should be smooth sailing.

